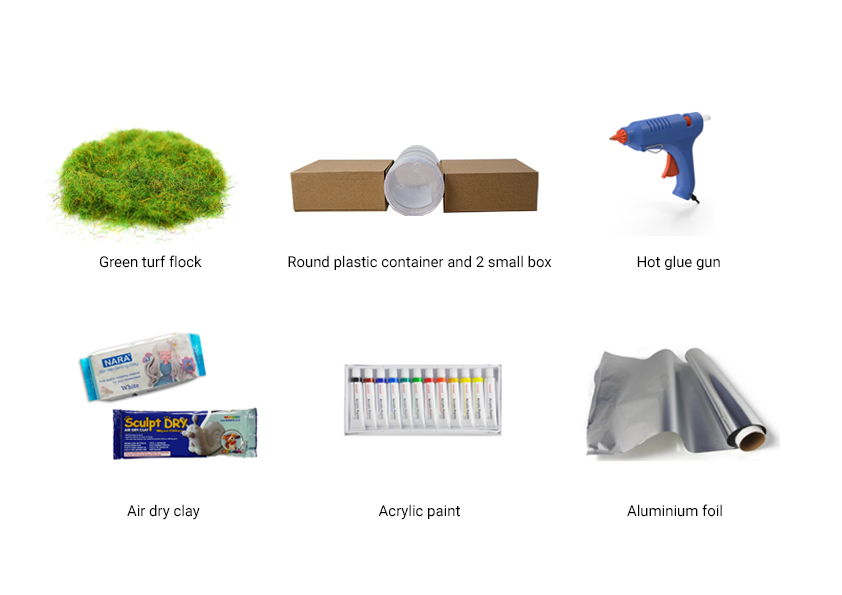


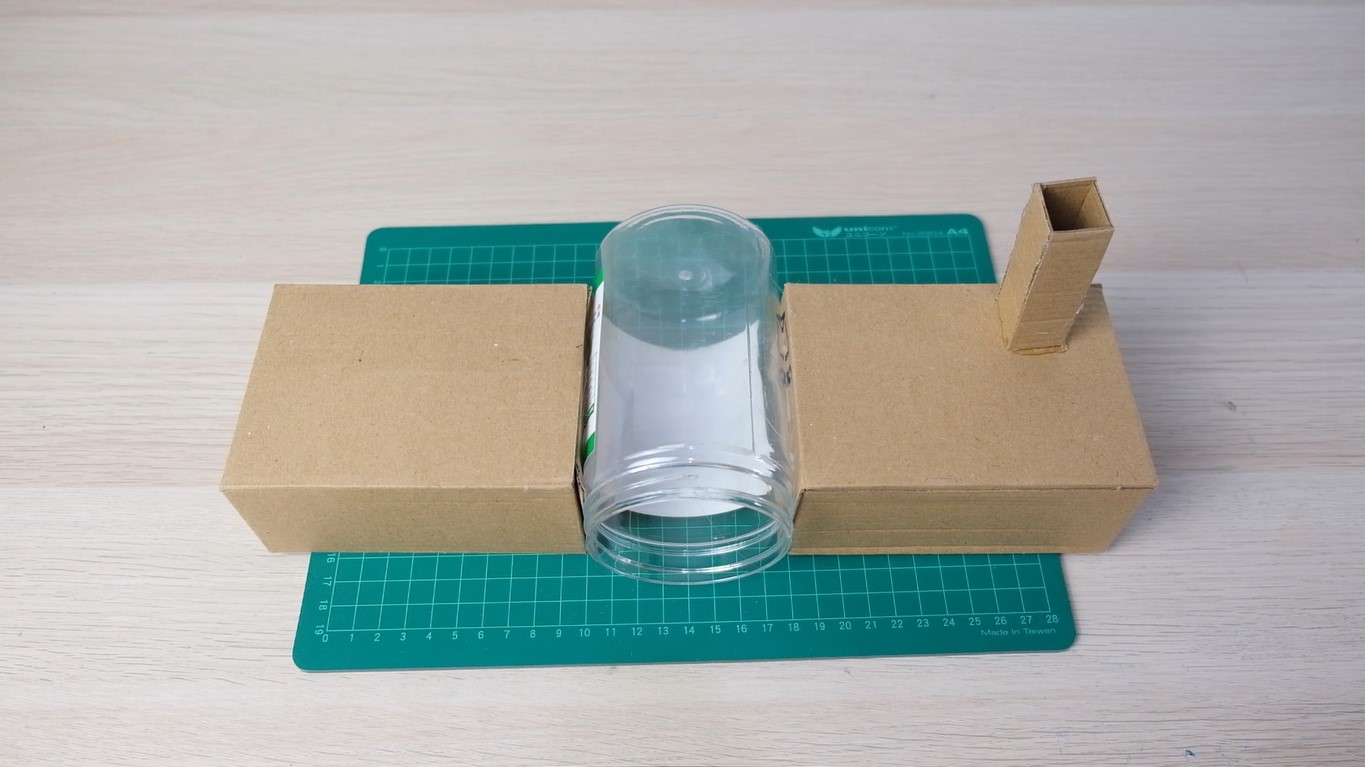
Basically there are 5 major steps: firstly, is making the shape using cardboard box and round plastic bottle.
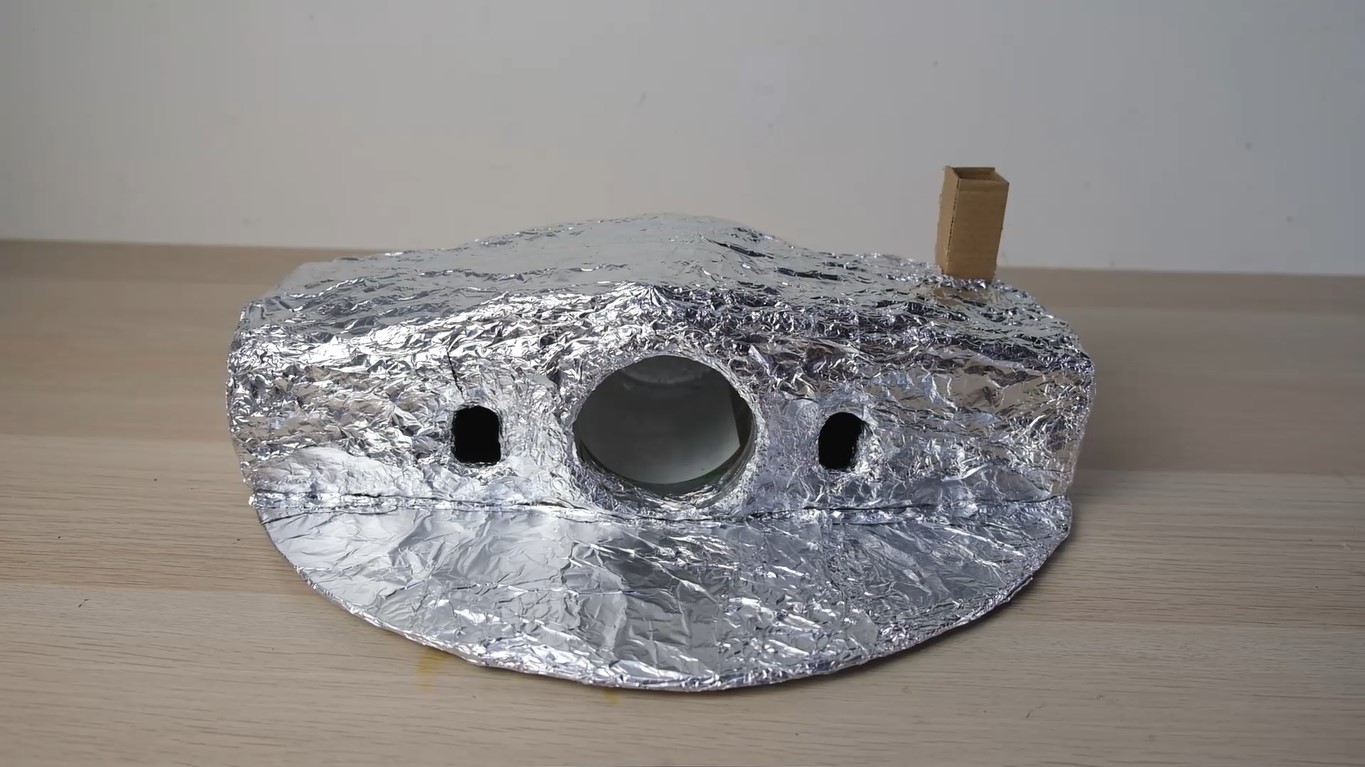
Step 2 is adding the aluminium foil as a permanent armature under clay.
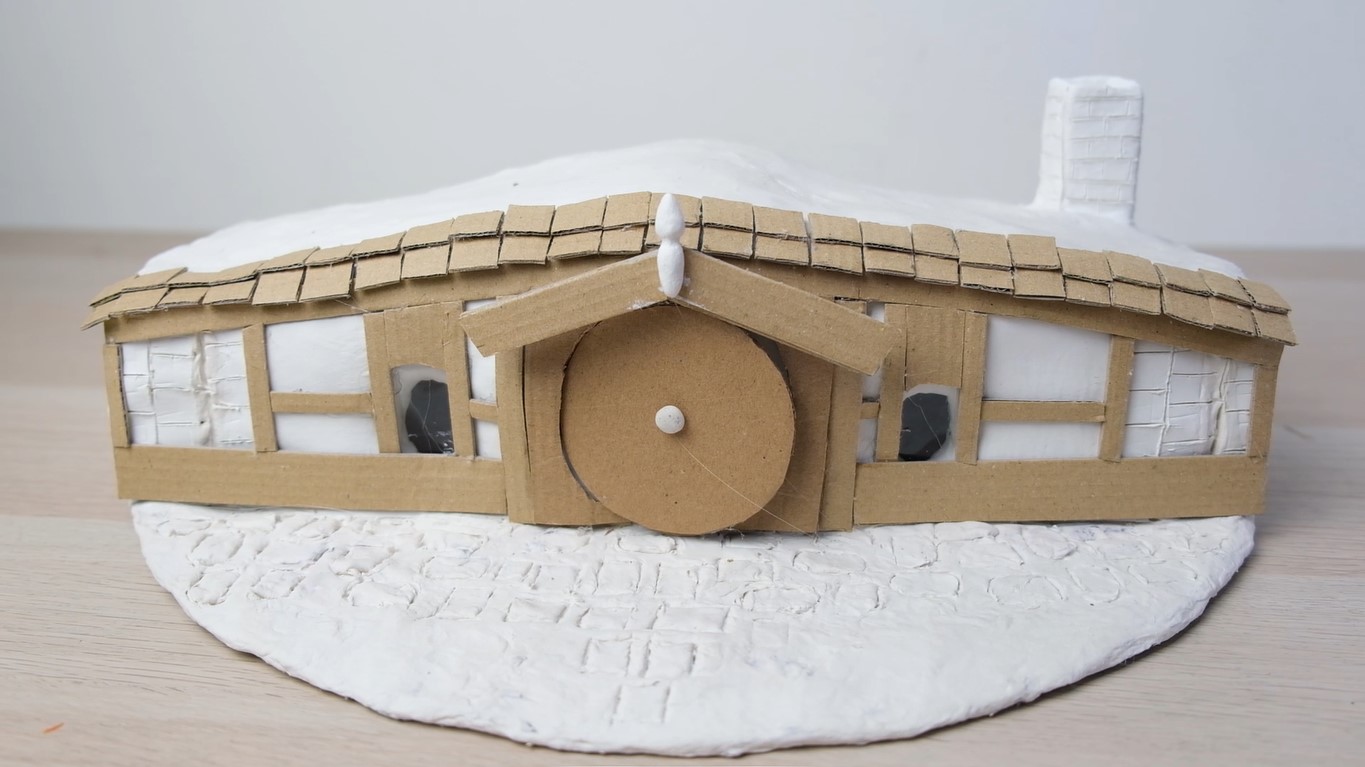
Step 3 is about wrapping the hobbit house with air dry clay, defining the shape desired, adding element and the textures
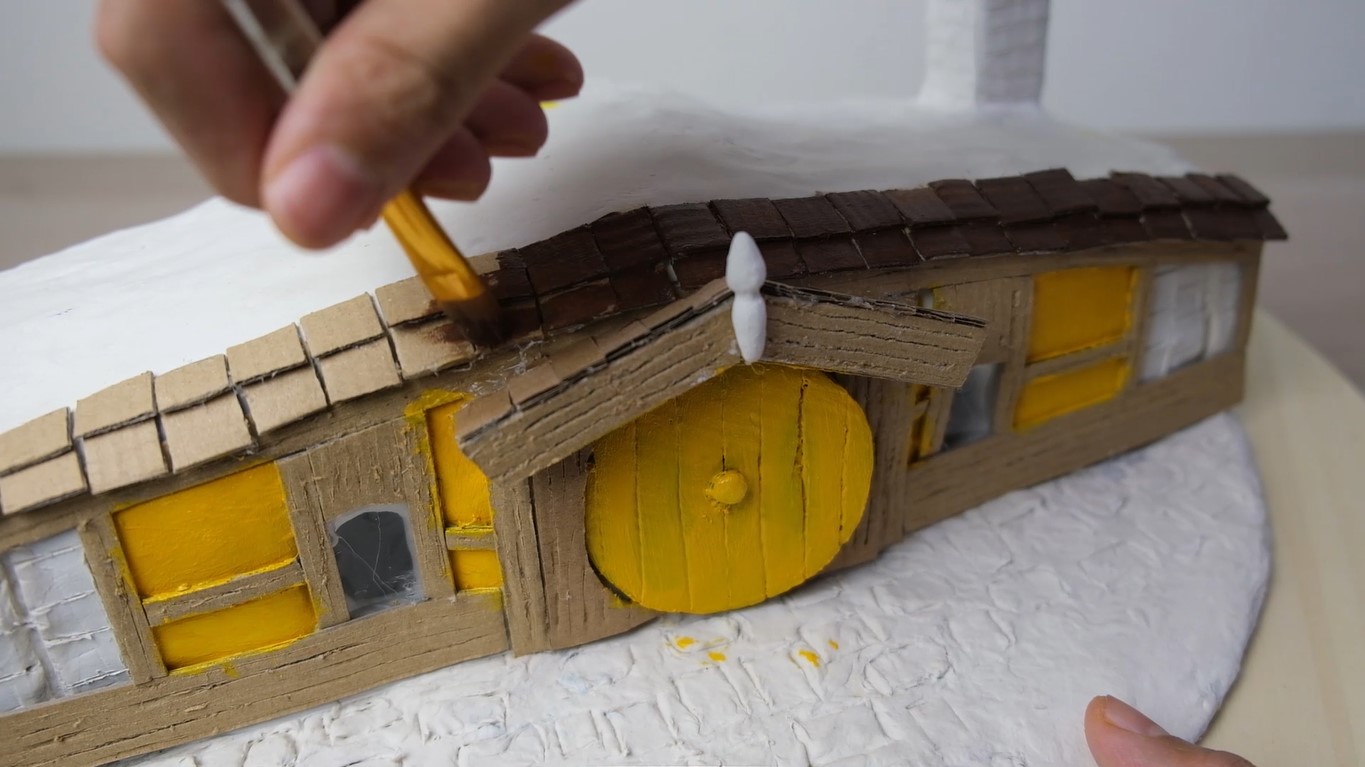
Step 4 is painting the miniature. It's satisfying to see the plain white color of air dry clay turns to awesome house.

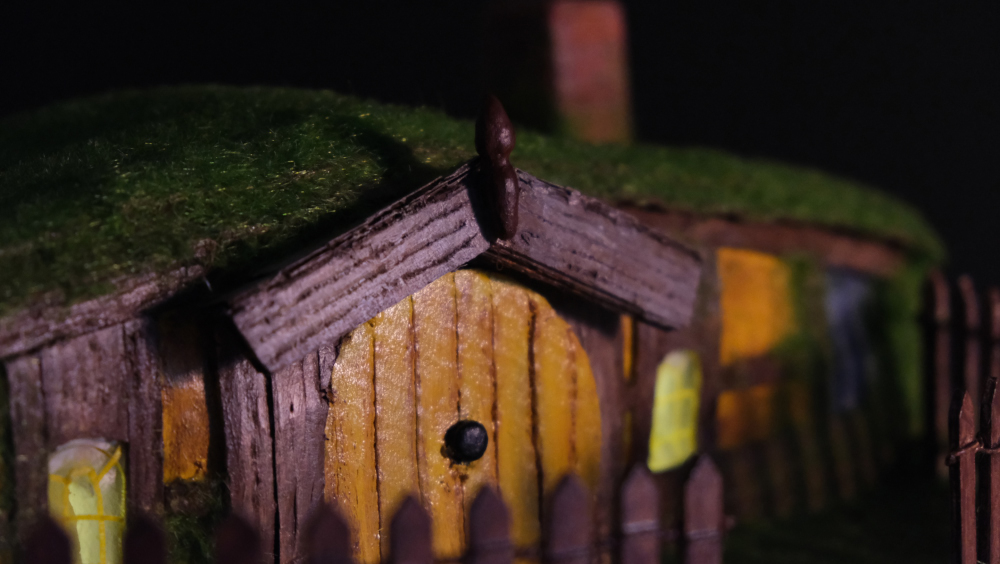
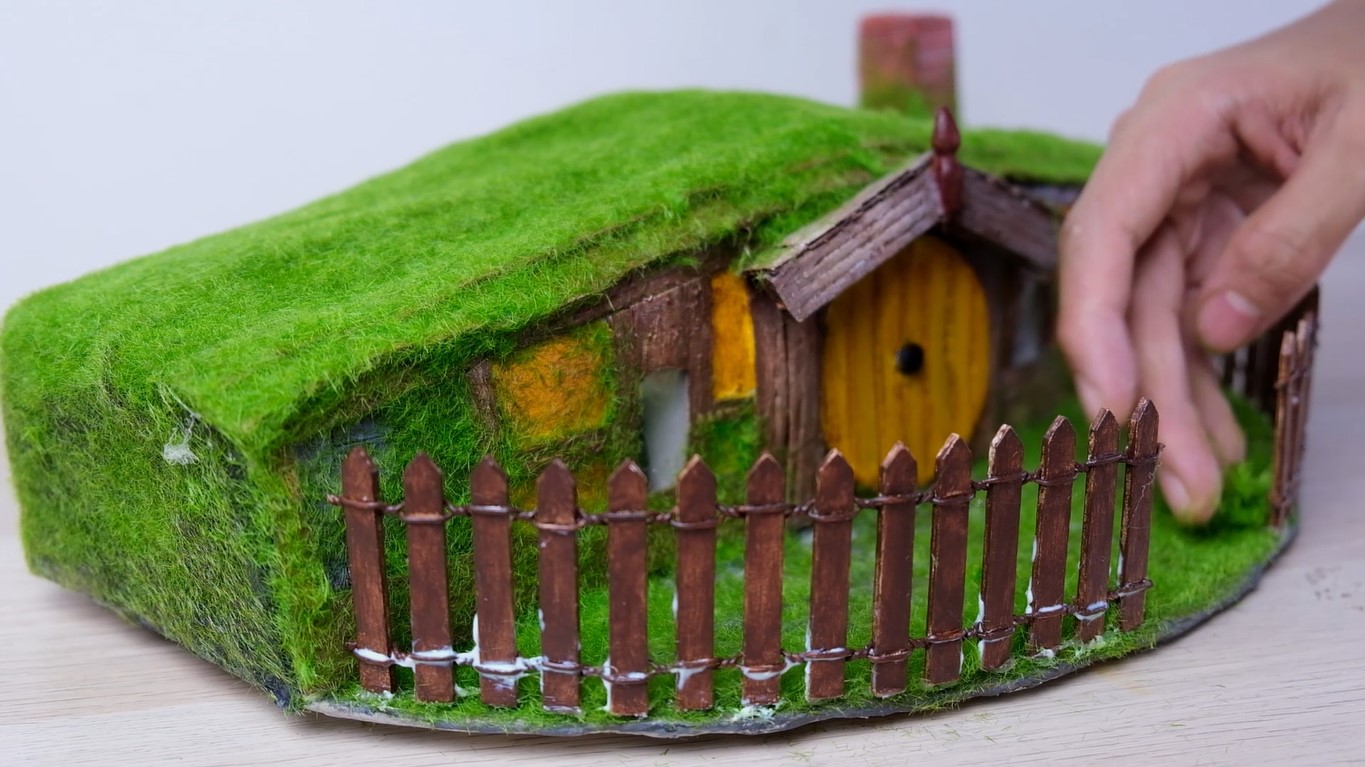
Step 5 to make it look similar like a real hobbit hole, the painted miniature was covered entirely by turf grass flock


If you like this and want to make one for yourself, visit my YouTube channel and watch the whole video. Please SUBSCRIBE to my channel, so you’ll be notified when new video uploaded. Thank you very much! 


